BACK TO PAGE 1
ENCODING WITH COMPRESSOR
STEP TWO - CONVERTING TO MPEG2 & AC3 WITH COMPRESSOR
You should now have a Quicktime reference movie on your Desktop.
-1- Now you want to start Compressor. If you do not see it in the program dock at the bottom of the screen, use the Spotlight search function to locate it on the computer
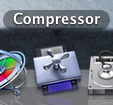
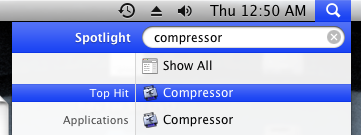
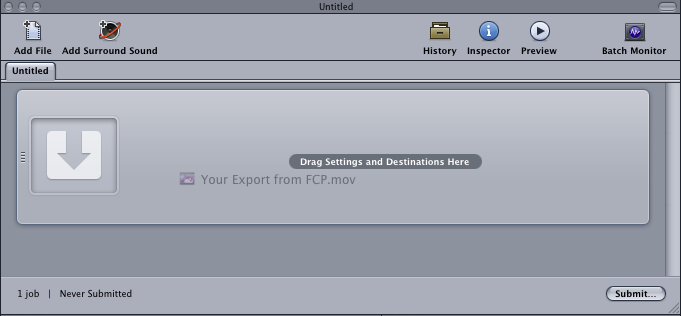
-2- Start Compressor and drag your FCP QuickTime reference movie export into the top window where it says "Drag Settings and Destinations Here"
-3- Go down to the "Settings" window of compressor and navigate your way to Apple > DVD > DVD: Best Quality 90 Minutes
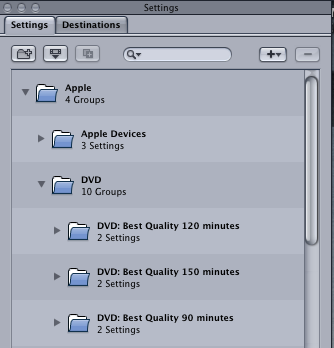
-4- Using your mouse, grab the "DVD: Best Quality 90 minutes" folder and drag it up to where you just dropped your FCP export file (the "Settings and Destinations" window) and it will add the audio (Dolby Digital) as well as the video (MPEG-2 6.2Mbps) settings to your batch.
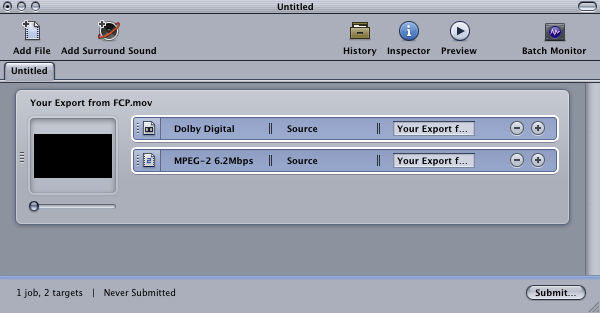
-5- If you would like to change/tweak the encoding settings for either the video or the audio, single-click on the appropriate line as seen in the above picture. NOTE: You have to select just the line for either the Video or the Audio. Merely selecting the whole export window will not work. Once you've highlighted either the "Dolby Digital" or the "MPEG-2 6.2Mbps" lines, you can see and change the settings in the "Inspector" window.
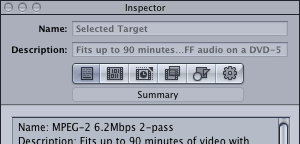
-6- For this class you will need to change some of the audio settings. So select just the "Dolby Digital" line and the Inspector window should reveal the audio-specific setting options. There is a line of six icon-buttons within the Inspector window. The second one from the left is the "Encoder" tab (hover your mouse pointer over these buttons to see their names). Click it.
-7- You will now see a number of options. Within the "Encoder" window you should see three tabs. The first one is "Audio". If it's not selected already, click on it.
At the bottom of this tab there is a setting for "Dialogue Normalization". The default setting is -12 dBFS. Change this to -31 dBFS
-8- Now select the "PreProcessing" tab and change the "Compression Preset" from "Film Standard Compression" to "NONE". In this same tab you will also see a "Low Pass Filter" and a "DC Filter" which are checked by default. You should UN-check both of these.
-9- Now that you're done adjusting the audio settings, you are ready to begin the conversion to MPEG-2. Back at the top window, where your file is, you should click the "Submit..." button.
![]()
-10- You may get another window that pops up. Just click "Submit" again. Your file is now being converted. To see the progress, you must first open the "Batch Monitor". You do this by pressing the button at the top left of the window:

-11- Once the Batch Monitor has opened up, you must click "This Computer"

Clicking that will reveal your current batch conversion. Click the little triangles to open up each level and you will eventually see exactly where you are in the process of the conversion.
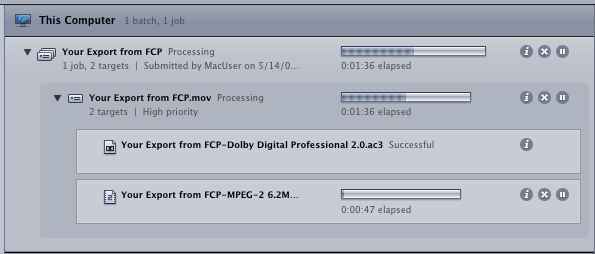
When it's complete, you will have two files, one for your audio (which will have the .ac3 filetype) and one which is your video (in .m2v format). Unless you changed their location, these should be in the same location as your original QuickTime export reference movie.
-12- Your files have now been converted into the proper format for burning to DVD. These are the two files you will need to upload to the Assignment Inbox once you have completed this project.
If you would like to burn these files to a DVD, click to the next step, page 10. Note that an actual burned DVD is not required for this class, only the .m2v and .ac3 files, so if you do NOT want to know how to actually burn a DVD using DVD Studio Pro, just move ahead to page 4.
FORWARD TO PAGE 3
OR
FORWARD TO PAGE 4